


Friday, March 30, 2012
Exciting Secret!
Okay so I am just too excited I cannot wait any longer. As of now a lot of things are happening, and I do not want to give it away yet until things are set in stone & for sure, I'll know tomorrow! AHHH! BUT, if things go great, in about a month or so I plan to be taking on a new project! A big project! & I'm so excited! I get excited easily. But it's going to be awesome!! ahh I don't want to give too much away but definitely be looking forward to some awesome things coming soon! :) Hope you are all having a beautiful week!
Thursday, March 29, 2012
I found Heaven!!!
Okay so not really...lol, but I took this picture yesterday of this cloud & it just looked kinda cool so I had to share it. My cheap camera I carry around couldnt quite capture the light that was shining through the cloud. It looked AWESOME in person, absolutely beautiful, but this was the best I could capture!

Just something beautiful for your day!

Just something beautiful for your day!
Wednesday, March 28, 2012
Some Blog Design Updates & Tips.
Hey Party People!
So I have been as you know on the prowl for figuring out how to beautify my blog & I've been learning new things as I go, making some changes, and starting to figure out some stuff. {starting being the key word} LOL. No need to be greedy, so I will link you guys to the sites and programs that have been helpful to me so far, and I would hope you would return the favor & some of you give me tips & hints as well.
[NO PROFESSIONAL SKILLS OR PROGRAMS REQUIRED]
(All the programs I use are FREE)
Changing Background:
So anyways, I have a new background (which I got from The Hot Bliggity Blog Website ) They have all kinds of free backgrounds for your blog! They are awesome. Once you hit install is copies the code for you and it then gives you instructions how to apply it to your blog. I had the Watermark theme on the template designer on mine and could not figure out why it just was not working right, but then I realized the site says it works best with windows picture theme or minima which makes it to where you cant use the template designer, so I changed my template to the Windows Picture one. and wah-laa, awesome background applied!
Personalized Signature:
I also got a new signature which I made myself using the program Picnik, which will not be around after April 2012 so use it while you can, I will miss is SOO MUCH! But there is a site called Picmonkey.com that has kind of a similar setup but they don't have near as many fonts or stickers or anything, but basically the same effects, but I'm still so dissapointed. So for my signature I used the dimensions 175px wide by 100 px tall i believe. Then to put it on I just used the tutorial Here at seven thirty three on how to add a signature. (which this website also has tutorials & stuff). Bam! New sig! (tip: works best with white background unless you make the background of your sig the same color as your post background)
Personalized Header:
So in order to not have to explain how to do this I will just link you to the awesome website that helped me figure out how to do it. It is Here on the wonderful website Dawn-by-design.com which has all kinds of blog design tutorials. However on that tutorial it says to subtract 70 which I didn't & mine turned out perfect. I took the length dimensions and used Paint to make a plain white rectangle the length of the px my header should be and I just chose a height randomly by what looked best to me with the length (if that makes sense). But I googled "Free printable labels" to make my pretty design thing on my header. Then I copied & pasted that to my Header I had started on paint and saved it. Then I opened it up on Picnik to add the text and color and designs & such. (paint sometimes makes the pictures look blurry so I try not to use it more than I have to.) Then after I designed it I used the tutorial on the Dawn-by-design website I linked and yay! I LOVE my header!
Grab Button:
Next is my grab button, which was most definitely probably the easiest thing I had to do. I made one before but didn't like it as much as I'd hoped it was too plain, so decided to go back and try again since it was so easy. The dimensions I used where 200px by 200px. Of course I made this box in paint and made it the color I wanted it. Then I uploaded it to picnik to do the editing. Then after saving it & having it the way I want I just followed the tutorial right HERE (Shabby Blogs) which they also have a few other blog tutorials as well. So grab a button if you'd like, lol since I'm being so helpful & all HAHA!
Making & Adding A Post Divider
Finally the last change I made today was adding a Post divider! I take back what I said about the Grab Button being the easiest thing, because this was pretty darn easy as well. I didn't use any particular size for this I just opened Paint and made it around the size I thought would be good for my blog. Next like always I uploaded it to Picnik (which I depend on ALOT, I don't know what I'm going to do when it's gone). I decided to just go with hearts, but not just any hearts, the same hearts I used on my Signature & my Header. So it will all sorta match somewhat (even tho I tend to like to mix all different colored pinks everywhere.) After I've made a cute divider I saved it & then followed the instructions on This Tutorial on Dawn-by-design.com.
SITES WITH TONS OF HELPFUL TUTORIALS:
These sites have LISTS of all kinds of tutorials for all kinds of things you could want to figure out about editing your blog & such! I loved these & they were so helpful.
Making Cute Blogs-Blogger Tutorials

Seven Thirty Three Blog (scroll down to the bottom of the page and there's all kinds of colored boxes of tutorials)

Now keep in mind I still have a few other ideas in mind for my blog so I might be posting more helpful things that I use, but I think I've made enough changes for today. But keep your eye out for another post explaining more things I plan to be doing to my blog & how I figure out how to do them. I hope someone may have found this helpful!
Friday, March 23, 2012
Blue Sky's & Flowers!
So this post is kind of pointless. But the last few days once I see the sky or some flowers looking kind of beautiful I have been pulling out my cell phone to take pictures, they were pretty so I just thought I'd share them with you all!


not too bad to be taken with a cell phone huh? I thought they were cute & just thought I'd share em. Hope you are all having a beautiful week!
Love,
Ashley *The Hillbilly Princess*
Tuesday, March 20, 2012
Blog Design? Tips & help needed.
I have spent days...hours upon hours, trying to figure out my blog design..
& omg! I give major props to all you out there who have mastered this.
From signatures to blog buttons & headers & links, ahhhhhh!!!
*PULLS HAIR OUT*
I wanted a cool custom signature, but yeah it wasn't working.
I'm taking this opportunity to try out a plain old signature made on a signature generating site or something
(you can go to it by click on my name below on my sig.)
I tried making blog buttons, yeah didn't look too good.
Cannot figure out how to put the menu bar thing on the top that takes you to individual sections & pages.
Wouldn't even know where to start.
BUT I have been changing & updating things slowly but surely.
I am just CLUELESS with all this blog design stuff.
Some people hire professional blog designers to fix up their blogs, but lord knows I surely can't afford that.
My blog will just have to remain mediocre & amateurish for now!
BUT, if any of you all know how to do anything that could help me or any tips
that would freakin awesome & greatly appreciated.
So GIVE ME SOME TIPS...
Just comment & send me links 2 tutorials or gimme' tips.
Whatever you got i'll check it out!!
Sunday, March 18, 2012
Strawberry & Angel Food Cake on a stick...With Chocolate!!
This has got to be THE BEST dessert I have had in a while! I'm talking AWESOMEEEE! & SUPER DUPER easy!
All ya need is:
Strawberry's
Angel Food Cake
Chocolate
& Skewers
SIMPLE RIGHT!
Just cut the tops off the strawberry where the leaf thing is, and cut the angel food cake into small squares. Stick em on a skewer one after another strawberry then angel rotating them. Then you just take chocolate (i used the chocolate that's supposed to turn to shell when you put it on ice cream & drizzled it on it, it don't turn to shell on this though) and wah-lahhh! A SUPER delicious dessert!


Friday, March 16, 2012
DIY: House Warming Shower Towel Cake!

WARNING: THIS WILL PROBABLY BE A SUPER LONG POST (got lots of pictures.) ANOTHER WARNING: Half of the pictures were taken with a cell phone & the other half a camera so some of the picture's aren't very good quality.
Had a Household shower to go to recently & decided to use my creative gift & make something for the lucky couple! & Ta-Da! My Sunflower Towel Cake was born! Yes Sunflower, Just like my previous craft DIY: Picture Cutting Board that i done for the same shower! Needless to say they loved both of their gifts but this cake was a BIG hit! It's taking so long to post this because it took a while to get around to getting all the pictures on the computer & such! This is a difficult project to explain so sorry if I confuse some of you!
ON TO THE PROJECT!...
SUPPLIES:
-PLATE (to put the actual cake on, i chose a yellow plate to flow with the sunflower theme)
-MEASURING CUP (to wrap the towel around for the smallest & largest tier)
-RIBBON (thick & thin, to match the colors you chose for the cake. for example:yellow, black & white)
-SAFETY PINS & RUBBER BANDS (to hold on the ribbon & towels)
-SCISSORS (to cut the ribbon)
-PLASTIC BAGS like walmart bags (to stuff inside to help it keep its shape)
-3 DISHTOWELS (in colors & designs of your choice)
-CONSTRUCTION PAPER & CARDBOARD (or colored card stock, used to make letters)
-CRAZY GLUE (to glue on the initials)
-MOD PODGE & FOAM BRUSH (I used this only for the sole purpose of getting the construction paper to stick to the cardboard to make it more sturdy, so if your using card stock you probably wont need this)
-FAKE FLOWERS[OPTIONAL] (i cut these & laid them around the plate because it is sunflower themed hellooo? lol)
-UTENSILS OF YOUR CHOICE (this is the fun part because you can mix & match these and put whatever utensils you want, I put those plastic spatula thingy's, wooden spoons, measuring spoons, & a flyswatter. Mix & match you can put spatula's or silverware or whatever you want.)

LETS BEGIN...
1. START WITH YOUR MEASURING CUP ON YOUR PLATE. This is your base. the measuring cup's handle will be on the backside of the cake.

2. WRAP TOWEL AROUND MEASURING CUP. Pick whichever of your towels you'd like.

3. SECURE IT WITH A RUBBER BAND. I put the rubber band in the center because there will be ribbon covering it there and it will be completely concealed.

4. MEASURE THICK RIBBON AROUND THE TOWEL. To see how much ribbon you need I simply wrapped it around the towel and cut where it there was a little extra ribbon at the end that would fold over the beginning of the ribbon.

5. SAFETY PIN THE THICK RIBBON. Pin it where it meets to secure it.

6. MEASURE THIN RIBBON AROUND THICKER RIBBON. Again simply wrap the thin ribbon around the first layer centering it on the thick ribbon and cut it so there is a little extra ribbon at the end that folds over the beginning of the ribbon.

7. SAFETY PIN THE THIN RIBBON CENTERED ON THE THICK ONE. then this side will go on the backside of the cake along with the measuring cups handle.

8. STUFF PLASTIC BAG IN MEASURING CUP. Not in any particular way, nobody will be seeing this part it is just to secure all of the things that are going on top not to fall all the way down into the cup.

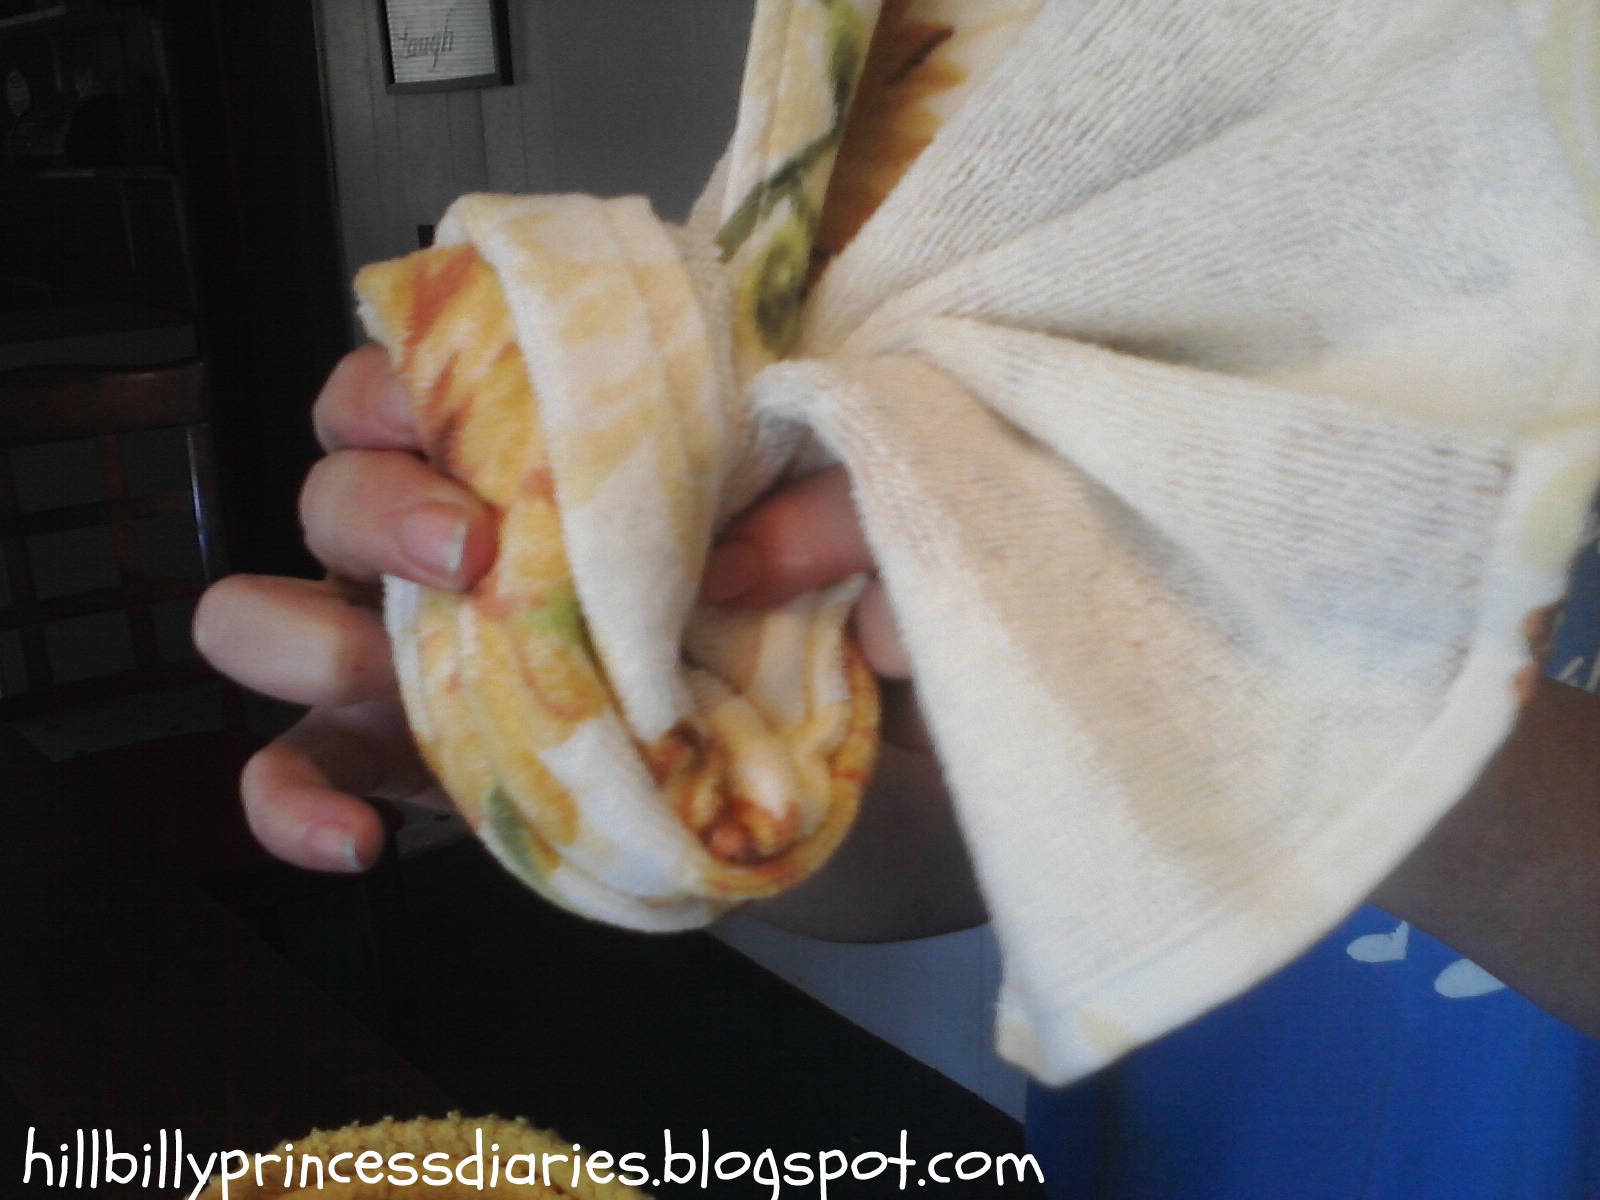
9. MAKE THE NEXT TIER! To do this we rolled a plastic shopping bag up and took the second towel and rolled it up in it. Then we stuck it in measuring cup, Wa-Laa the second tier is made!!


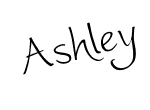
10. FAN FOLD THE 3rd TOWEL. I saved the towel with the designs for this one, We laid it out & folded it like a fan flipping it back & forth. Then after it is fan folded we folded it again in half. THEN we fold it again but this time we are taking the bottom and folding it over to make it thick enough to support the fan looking part. Then stick this part down in the top of the second tier so the fan is hanging out of the second tier.


THIS IS WHAT IT SHOULD BE LOOKING LIKE SO FAR....

11. MAKE INITIALS. This of course is optional but I thought it would be such a cute touch, I drew out the initials of the people I was making the cake for on construction paper. D & E. I then taped the construction paper onto a piece of cardboard. (i just used the back of a packaging that some of the utensils come in.)

12. CUT INITIALS out of the paper & cardboard after taping them together, the cardboard is to make the initials more sturdy.


13. MOD-PODGE CONSTRUCTION PAPER TO CARDBOARD. so the construction paper is all you see but it's sturdy like cardboard.


14. CRAZY GLUE INITIALS TO RIBBON. I just dabbed crazy glue onto the back center of the letters & stuck it to the front center of the ribbon on the cake. Hold it a few seconds til it dries enough to hold up.


THIS IS WHAT IT'S LOOKING LIKE NOW!!

15. OPTIONAL-I PUT MY FLY SWATTER IN TO BE LIKE A TOPPER! I just stuck it in the middle of the top tier so it's sticking up out of the top.

HERE'S WHAT IT LOOKS LIKE.

16. USING THICK & THIN RIBBON MAKE A BOW! I folded the thick ribbon a few times over-top itself, after cutting a small strip of the thin ribbon, I held the center of the thick ribbon & wrapped the thin ribbon around it. I tied it in a knot on the back. BAM! A BOW!


17. ATTACH BOW TO CAKE! I pushed a safety pin through the back of the bow through the thin ribbon & attached it to the front of the cake!

THIS IS WHAT IT LOOKS LIKE!

18. FILL WITH UTENSILS. This is the funnest part, sticking spoons & spatulas & etc all over sticking out of every which way!

19. CUT & PLACE FLOWERS. We cut up a $1 bunch of sunflowers bought from dollar tree & just stuck the flowers around the bottom of the plate & in random places sticking out of the towels like the utensils.

WA-LAAA!!!
CLOSE UPS!


This was a HUGEEE hit! They loved it so much they refused to even take it apart, it is now their centerpiece! Hope this wasnt too confusing for you all!!

Subscribe to:
Posts (Atom)