

I'm back and running with a new tutorial that I thought was just totally cute and as easy as it gets. Like honestly It's as easy as putting a picture into a picture frame, lol.
this is my:
EASY STYLISH D.I.Y. DRY ERASE BOARD TUTORIAL

This DIY stylish dry erase board would make a nice lil gift, I made this one for my mom for her birthday which is in about two weeks. I'm going to write Happy Birthday on it though right before I give it to her.
Cost: about $2
Supplies needed:
-Xacto Knife(optional, i just cant cut a straight line with scissors)-already had
-Scissors-already had
-Scrapbook paper-(in whatever color or design u want ur background 2 be)-already had
-A Picture Frame (I wanted 12x12 to fit my scrapbook paper but all i could find was a 11.5x8 or something like that..make sure the clear part is glass & not plastic)-bought at dollar tree for $1
-Dry erase marker-$1 for a pack
-Velcrow sticker circle things lol (optional)- i already had these but i think u can get em for about $1 @ walmart
1. Pick your background. I am making this to be a possible Menu board or shopping list for my mom for her kitchen so i matched up my scrapbook paper to be my background with the colors of her kitchen.

2. Take the demo picture out of the frame. BUT DON'T THROW IT AWAY JUST YET! This picture that came in the frame is going to be your guide for getting your scrapbook paper the perfect size for your frame.


3. Cut the scrapbook paper to the size of the picture. Just do it. lol put the picture on the scrap book paper and follow the line


4. Put your design in the picture frame. Once this step is done you can stop here & to go the extra lil step to add marker convenience is completely up to you.

(NEXT STEPS OPTIONAL)
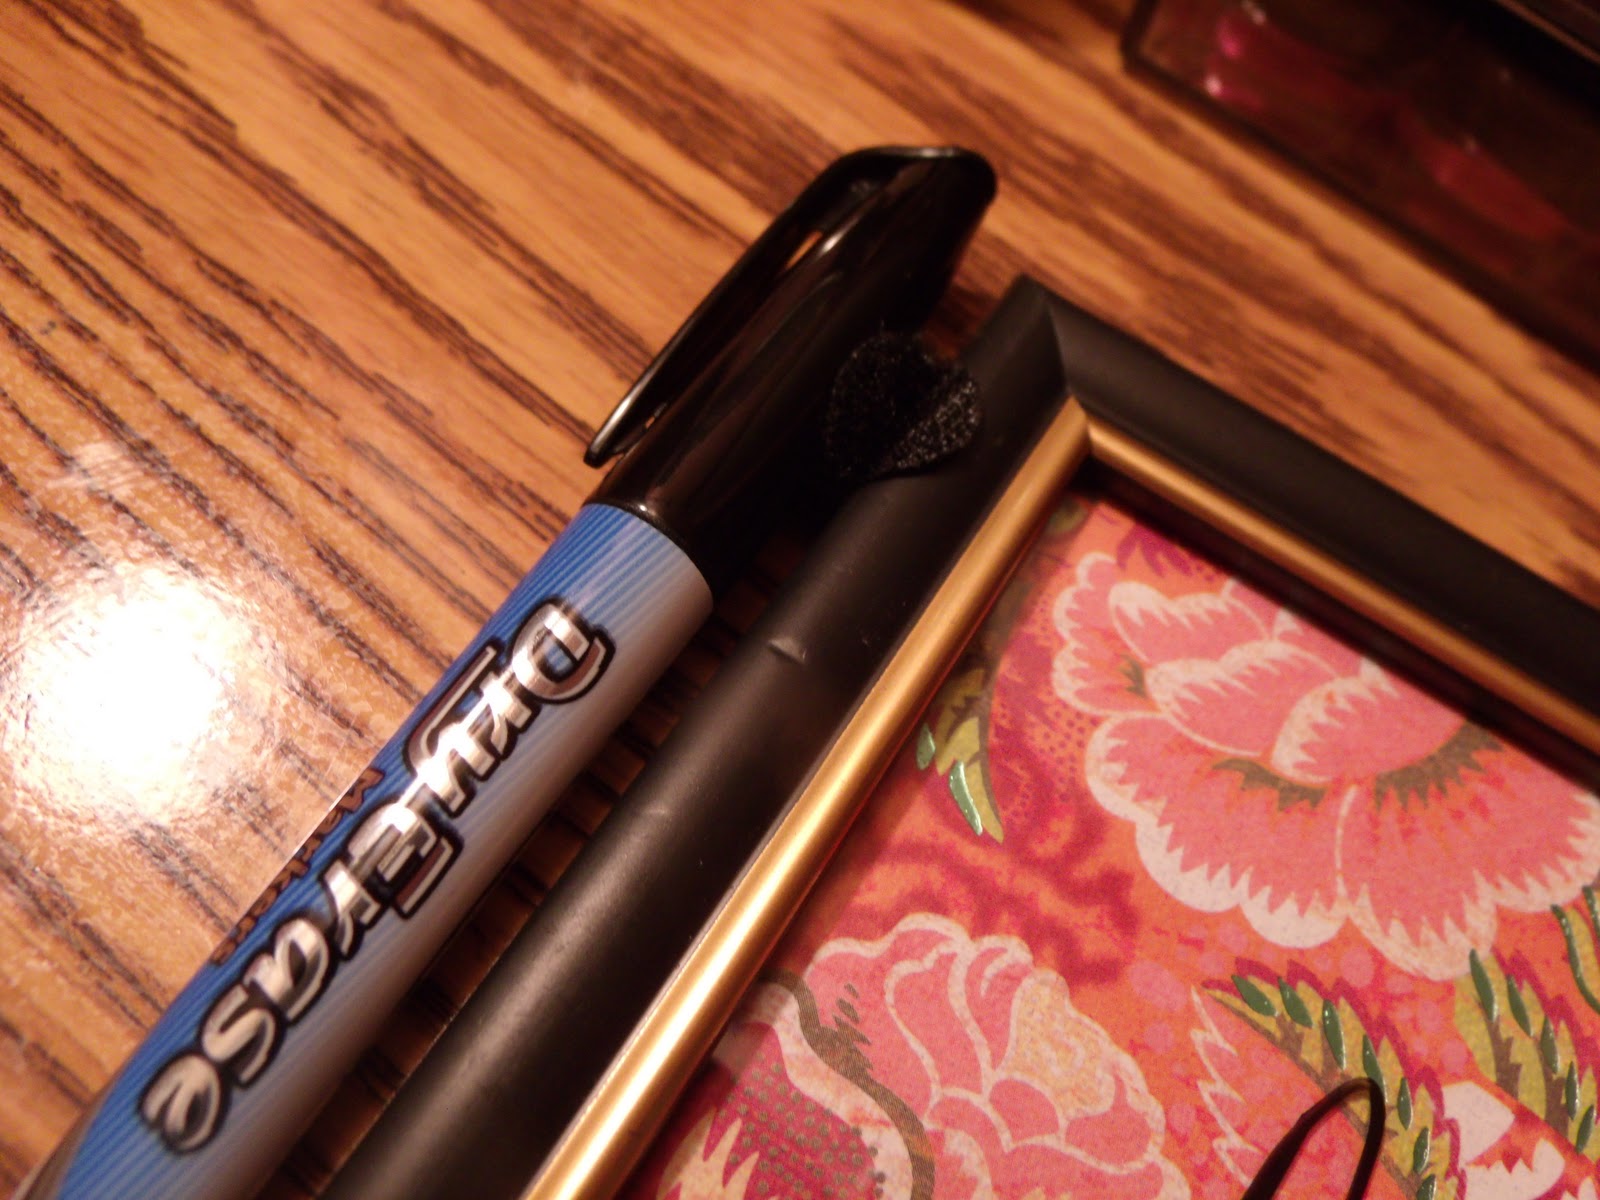
5. Take Velcro Circle & Put it on the side of the frame. This is so your marker stays with your frame.

6. Stick the other circle Velcro sticker to the marker. & BAM! Your marker stays with your board.
Now that you've made your board, lets talk about a few things you can do with it.
This one's main purpose is to act as a menu board or a shopping list to be hung in your kitchen, but the possibilities are endless.
So here's a few of my suggestions:
Menu Board
Shopping List
To-Do Board
Family Message Board
School Assignment Schedule
Board for leaving cute notes for someone
Weekly Plans/Schedule
Chore Chart
Random Notes
and many more...
THESE MAKE GREAT GIFTS!
No comments:
Post a Comment