Lets Begin!
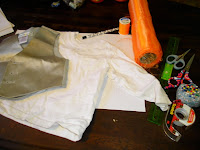
1. Get your supplies together! (i used old paper -mine was practice invitations that i didn't need so i used the backs-, orange fabric for the front, an old shirt of my nephews, scissors, pins, thread in white & orange, scotch tape, and my nephew old vest -but in the wrong color- to use for measuring.

2. I traced a template using the old vest on the scrap paper. (which i taped together to make big enuff)

<---looks like this.

3. Then i cut out the template i made. (but i didnt cut on the lines i cut bout half an inch out for space for the seams.
4. Next i traced the template onto the old shirt. (for the back of the vest. I used white cause u wont see it under his jacket)
5. After that i cut out the traced vest back on the shirt.

6. Then i done steps 4-5 with the orange fabric with the front template of the vest.(but i done each template twice so one could be the inside linen and the other the outside, makes it thicker and stronger.)
7. Next i put then right sides together (like its inside out) and pinned where its to be sew.
8. Only sew the collar, arms, and bottom of the back.

 9. Sew all the front EXCEPT the shoulders and the sides.
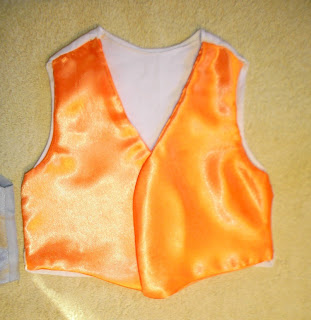
 <--should look something like this
10. Flip the front parts right side out now using the opening you left on the side.
 11. Now to attach the vest together.
Put right sides together again, and pin shoulders.
 12. Sew the shoulders to the back of the shirt. (make sure u sew it good, this part needs to be strong)
13. Do steps 11-12 with the sides of the vest!

14. You should be done sewing, now flip it around right side out.
15. Iron it. It probably doesn't have a good solid shape (atleast mine didnt) so iron it to straighten it out.

16. DONE! Finally!!
Tonight i'm going to walmart to get Velcro (instead of buttons) so he can get it off himself at the end.
Im pretty proud.
-Another INTIMIDATING project done
by the hillbilly princess <3


No comments:
Post a Comment