Image Map

Monday, October 8, 2012

Hand painted Sunflower Wine Glasses


Welcome back to my blog, Hillbilly Princess Diaries! This is my first post for my DIY Christmas! Find my first post Here where I explain what I'm doing! 

Technically I made this for a birthday present for my husbands cousin (who I love by the way, she is the best) but It would also make a great Christmas present for those wine lovers in your family. You can paint anything on them, not just sunflowers (Hub's cuz loves sunflowers & has been drinking wine a bit lately). These are however for decoration for her kitchen (I would imagine the paint would wash off & I haven't yet tried to figure out how to prevent that.) You do not have to be an artist to do this, trust me my sunflowers are not perfect AT ALL, but that's what makes them each different and unique.


SUPPLIES:
All you need is,
Wine Glass. (I used 4 different mix-matched glasses I got at a local thrift store for .50 cents a piece, but you can buy matching glasses if that's what you prefer at the dollar store for only a dollar a piece, I just liked the mix-matched look.)
Acrylic Paint (in colors of your choice)
Paint Brushes (I used all different sizes)
and inspiration!

COLORS:
Green- Folk Art Brand Paint. "Apple Orchard"
Yellow-Apple Barrel Brand Paint. "Dandelion Yellow"
Black- Apple Barrel Brand Paint. "Black"


This isnt the best picture because of the big window in the background, but this is the setup I used when I painted my glasses. Pretty easy peasey! I just got me a table with a lot of light (hence the big window) so I could see good, and got to painting.

Now I did not take pictures of the steps or anything because basically what I did was super simple & really doesn't even need explaining. But I will be specific with what I did.

1. First, Clean you wine glasses, you want them to be clean when you paint them.

2. Choose your paint brushes in the sizes you want and the colors you desire.

3. It helps to look at a picture of whatever it is your going to be painting, just to keep an idea of what it looks like fresh in your mind. I just Googled "Sunflowers" under images, to give me ideas & inspiration.

4. Paint your pictures on your wine glasses. (I done 4 different wine glasses, all different size glasses with different size sunflowers on them. It's like a whole collection.)

5. Let Dry & Gift!


The hubs cousin loved hers. I told her it was a one of a kind set called the Sunflower Collection! LOL. If you decide to make a hand painted wine glass set like I did, you know the person you are making it for will get a one of a kind set that is completely unique! Thank you guys for stopping by and I hope you enjoyed this gift idea, It's super cheap & super easy to make.




Monday, October 1, 2012

A DIY Christmas!

So lately I've had Christmas on the brain! I know I know, Halloween hasn't even come yet, you think I don't know how crazy I am? But there are less than 3 months til Christmas, LESS THAN! I usually like to start my Christmas shopping early to get a head start so it doesn't get stressful & overwhelming come December when I should be enjoying the holiday season.


This year I will  more then likely be making most of my gifts (gotta be on the cheap since were trying to fix our house and we don't have a very big budget, but we have a very long Christmas list). So I am just informing you guys ahead of time that you will start seeing gifts being made soon, it's time to get my ball on a roll.

So for the next 2 1/2 to 3 months I will more than likely be posting some DIY Christmas Gift Ideas, & maybe even some DIY decorations!  It's hard to decorate since where we are staying is temporary until we fix our place so I haven't really got to decorate at all, but I might make a few small decoration things for the holidays, but it will mostly be gifts! I'm so excited & I hope you guys are too.


                 This Christmas Planner can be found at The Scrap Shoppe Blog! 
I was going to start a Christmas Planner, but just decided to add a Christmas section into my family binder instead to stay organized this holiday season. But if you want to make a one, I seen this Christmas planner that I LOVED. It was a great inspiration, Check out The Christmas Planner Here at The Scrap Shoppe!


Here come's Santa Claus, Here come's Santa Claus, Right down Santa Claus Lane!!!
La La La La, Lala Lalala, LA LA LALALA!
Yep that's right, I'm one of those! I'm one of those crazy Christmas freaks that once it starts getting chilly I start talking nothing but Christmas, wear Christmas sweaters, make fun days out of wrapping presents, paint my nails in Christmas colors, and sings Christmas Carols like ALL the time! I actually this past week made a Christmas playlist to listen to, to keep me in the spirit (which isn't hard to do). & Here's a pic of my nails from last Christmas
My 2011 Christmas Nails!


So tune in for some possible gift ideas on the cheap!! We'll have a very DIY Christmas together!
*I'm dreaminggg of a DIYYYYYY Christmassss! One where the gifts are all handmadeeeee*

Are you starting to feel bad for the hubs?? You should be! Haha, he's such a scrooge! Bah Humbug!

View DIY Christmas gifts below:  (I'll add more as I make them)
Hand painted Wine Glass Set
More coming soon...


Thursday, September 27, 2012

Updates + Me!? NAILED IT!

I originally had this post titled “late night ramblings” (because I wrote it last night) Then I realized I am considering 11 o’clock at night late, a 21 year old who thinks 11 is late…yeah that’s how lame I am! If by lame you mean AWESOME, NAILED IT!…yeah sorry bout that I have been watching a lot of How I Met Your Mother on Netflix,  its Legend-wait for it-DARY! Okay I’m done!

I decided to talk tonight (I know run for the hills). But I realized I don’t exactly share a lot on this blog, it’s mostly my projects or random things but never me talking or sharing anything. Do you guys even know me at all? I bet not! So I just feel like to get a better feel for me maybe I should talk a little bit & share maybe. Have I scared you away yet? If you’ve made it this far congratulations, you deserve a cookie!
Lets start off with: I am BORED! The hubs come home from work, and I kid you not, fell asleep before he was even here 3 minutes. He crashed out on the bed with boots on and sunglasses still on his head. He obviously worked extremely hard. Me being the loving wife I am took his boots & sunglasses off for him, he didn’t budge. Don’t worry I checked for breathing, he’s still alive! LOL. But usually I do everything I have to do during the day while he is at work and then in the evenings I try to spend them with him (mostly just watching tv.) But tonight, I am going solo…well until I decided to blog. hello friends! :)

WINDOWS LIVE WRITER? Wonder why I randomly blurted that?? It’s because I am using it right now, for the first time, ever! I have heard people rave about how its much easier to use then the blogger writer so I decided I would give it a try and I have no clue what I’m doing or how to even post what I’m typing. I’m not really experimenting with anything just yet, just typing my little heart out. You all will hate me by the end of this post because of all the talking. Another thing to learn about me, I am a talk-aholic. I could talk/type for days! One of my many charms.

PROJECT: MAKING HOME! I might as well break this post down into sections and the next thing on my mind is my home. UGHHH!!! *pulls hair out* Things are progressing slowly as I knew they would but gosh, it is quite stressful. Uncle-in-law came to help and he’s got a lot done but one of the main things I really want done has yet to even be touched. Because of this I have come to the conclusion that I need to suck it up, learn how to use a saw, & build what I need myself. What may you ask do I need, my bar. No not like a place to store booze, but like an island bar. There was one in my place until father-in-law decided to go out on whim and rip it out, and by rip I mean DEMOLISH! It was unsalvageable! Uncle-in-law promised to build me a new one back (to save some dough) since he works on homes and does things like that for a living. Might not be happening, Uncle-in-law is possibly leaving soon. Once we get the slightest chill in the air that signals fall or winter could be approaching he jets back down south to sunny Florida! (who could blame him?) So I’m going to have to put my big girl pants on & start building. (now’s the time to really run for the hills haha). Can’t be too hard right?…uhhh right??……and yes I have noticed my lack of Project: Making Home posts, not because of lack of work. We’ve worked out tush’s off for weeks. But it’s nothing I can really post tutorials on mostly just updates and I have took sooo many pictures I honestly just do not want to go through them and have to organize them. Yes I am honestly and openly admitting that there have been no Project Making Home posts because of pure laziness!

I think I have talked your heads off enough for one day, sorry for the boring post but I was bored myself and felt like you guys could maybe get a better feel for me if I talked to you a little bit more, don’t worry I’m not gonna be posting big long posts like this on the regular, maybe everyone once in a while! Hope that’s okay, I love all my loyal followers! If you have any questions you can comment or send me an email (my email address is Here). If you haven’t figured out by now I love to talk, so feel free to message. haha! Love & appreciate you all!


Monday, September 24, 2012

Dog Silhouette Wall Art Tutorial

Hey I apologize for it taking so long to get another post up, I was very badly sick for a while and have been working on my place like crazy!! Time was lost. I will try and post my progress on my home soon, to see what I've already done check out Project: Making Home!


I made three of these dog silhouettes of my dog Shaybug (who is staying with my mom). Two for me, one of her whole body & one of her head..& one full body one for my mom. I wasn't sure exactly which room I would hang mine in yet so I just picked two colors I know I'd like, blue & green! My mom's is pink to match  her bedroom. I've seen a few Dog Silhouettes floating around Pinterest & I absolutely love my furbaby so I knew it was a must do project. See how I done it below!!

Supplies:
Printed or drawn picture of dog
Scissors
Paint
Paint brushes (I used 2, a small one a medium sized one)
Canvas's


I got this 10 pack of 8 x 10 Canvas's for about $10-14 I think at Michael's. I used 3 in total for this project to make 3 separate silhouettes.


1. First you pick your pictures you are going to do your silhouette of. I chose these two of my baby girl. (isn't she adorable?! She's half Chihuahua and half Jack Russell, so hyper and lovable!)


2. Make your Fur-baby into a silhouette. I went to picmonkey & used the doodle feature to fill in where my dog is to make it a silhouette. Or I believe you can adjust the contrast on the picture & it will do basically the same thing.


3. Next your print out your silhouette. (I just traced mine, but printing would be ALOT easier!)


4. Next use Scissors to cut your silhouettes out.


5. I decided my placement on my canvas's where I wanted them to go. Then I took a pencil & I VERY lightly traced the silhouette carefully. the lighter it is the less chance you have of being able to see the pencil lines through your paint, especially if you are using a light color.


6. Just to ensure my dog silhouettes were light enough I took my eraser and erased my lines, not completely, but just enough to lighten up my lines so you couldn't see it through the paint but make sure you can still see the outline of your dog to paint it. (if that makes sense, I know I can be confusing.)


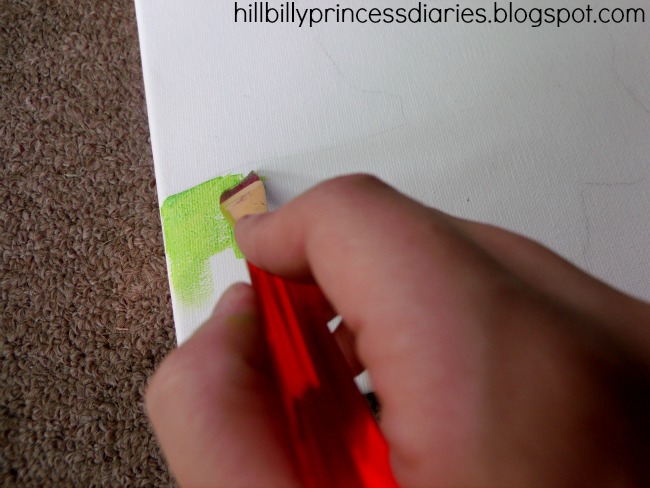
7. Next take your paint (in color of your choice) and paint either the dog or the background. I couldn't decide which to do so on the full body one I painted the background & left the dog white, but on the silhouette of my dogs head I just painted her head & left the background white. It's whichever you prefer.

(I used 2 paintbrushes, one small and one larger. I used the smaller one for actually outlining the dog and getting into the small spaces, and the larger one to cover more area at once getting the big open spaces.)

Paint Colors:
Blue Paint is Apple Barrel Acrylic Paint in "Bright Blue"
Green Paint is Folk Art Acrylic Paint in "Apple Orchard"
Pink Paint is Apple Barrel Acrylic Paint in "Pink Parfait"
(you'll see the pink in the final pictures)


I just started around the edges n then filled in the rest of what I had planned to paint.


8. Let Dry & Hang!! 


 I used the same picture & stencil for the pink one as I did the blue, I just rotated it to face a different way so they were a little different! I loved how they turned out & my mom loved hers!


These also make great gifts for your pet loving friends & family (which is what I'm doing with the pink one that I made for my mom). You can find someone who loves their pets and use pictures they've posted on Facebook to make it with.

I hope you guys enjoyed this, I had so much fun making it & I loved how they turned out. They are super easy and will look amazing hanging in any room. What better way to show your dog/cat/other pets how much you love them than by hanging personal handmade art of them.


Related Posts Plugin for WordPress, Blogger...