Image Map

Friday, April 29, 2011

Shoes & possible diy project!

Sooo, i was looking at shoes online. I need a pair for my wedding, and i was thinking i might be overambitious here but i like these alot & i think i could possibly make some blinged out shoes. I think it could come out cheaper then buying shoes i like for 30 dollars that are kinda boring from the store...or i could buy a 10 dollar pair of plain heels and spend bout 5 or 10 dollars on the crystals from walmart & glue... its nothing for sure im just considering it. It would be alot of work but would it be worth it? id be savin money and getting blinged out shoes..hmm...idk.

But on a lighter note, i have a pic of my bridesmaids shoes, of course compared to those pairs they look like the ugly stepsister, but i mean they are nice if u could actually see them lol. were in the country so the heels couldnt be high im not sure my girls can even walk in heels. i know i cant lol looks like ima have to learn.

Thursday, April 28, 2011

DIY Ring Bearer Vest (how i did it.)

Wow! Am i overambitious or what. i CANT sew, so don't think i'm one of those sewing guru's, no not at all, i hacked this up a few times lol. But i think the overall result it pretty good.
Lets Begin!
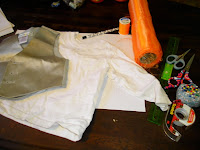
1. Get your supplies together! (i used old paper -mine was practice invitations that i didn't need so i used the backs-, orange fabric for the front, an old shirt of my nephews, scissors, pins, thread in white & orange, scotch tape, and my nephew old vest -but in the wrong color- to use for measuring.


2. I traced a template using the old vest on the scrap paper. (which i taped together to make big enuff)


<---looks like this. 
3. Then i cut out the template i made. (but i didnt cut on the lines i cut bout half an inch out for space for the seams.
4. Next i traced the template onto the old shirt. (for the back of the vest. I used white cause u wont see it under his jacket)
5. After that i cut out the traced vest back on the shirt.
6. Then i done steps 4-5 with the orange fabric with the front template of the vest.(but i done each template twice so one could be the inside linen and the other the outside, makes it thicker and stronger.)
 7. Next i put then right sides together (like its inside out) and pinned where its to be sew. 
8. Only sew the collar, arms, and bottom of the back.
9. Sew all the front EXCEPT the shoulders and the sides.<--should look something like this
10. Flip the front parts right side out now using the opening you left on the side.11. Now to attach the vest together.
Put right sides together again, and pin shoulders.
12. Sew the shoulders to the back of the shirt. (make sure u sew it good, this part needs to be strong)
13. Do steps 11-12 with the sides of the vest!
14. You should be done sewing, now flip it around right side out.
15. Iron it. It probably doesn't have a good solid shape (atleast mine didnt) so iron it to straighten it out.


16. DONE! Finally!!

<-with the one he already had but in the wrong color

Tonight i'm going to walmart to get Velcro (instead of buttons) so he can get it off himself at the end.
Im pretty proud.


-Another INTIMIDATING project done
       by the hillbilly princess <3

Finished all my Shirts!!!

Because of me & my maid of honor made shirts for us, everyone requested them. So i had a large order on my hands lol. I finally finished all of them. Hopefully nobody else asks for anymore, there's one more i made thats not in the pics because i dont see her often so i gave it to her when i seen her on Easter. Enjoy!
 

Wednesday, April 27, 2011

GOT A PLACE OMG!!!

Im so excited to say we booked a place for our wedding & went to look at it today & i LOVED IT. i will show u some sneak peaks of what it looks like. & Best part is its FREE                  


THE RECEPTION ROOM

THE CEREMONY ROOM


& Keep in mind we r gonna move the round tables from the ceremony room  to the reception room for the bride & groom table, wedding party table, & cake table. & the ceremony room will have an aisle and all the chairs set out. It's much better then i expected, yay!!!!

Tuesday, April 26, 2011

DIY aisle runner Instructions!

My inspiration was the 'road to the aisle' blog. i was so nervous & scared to do it because i didn't wanna risk screwing it up but i decided to give it a try and luckily it wasnt near as hard as i expected and i like how it turned out.
1. First you pick out what you want on it & draw or print it out. i printed out the names and date in "English 157 BT'' but i drew out the S on my own on poster board because i wanted my own S cause i couldnt find one i liked.
2. Get all your supplies together. (I got blue & orange paint, paint brushes in all different sizes, a paper plate to put the paint on, a cup of water for brush dipping & cleaning, wax paper, the template, pencil, the aisle runner, tape, & iPod-optional)
3. Tape it down how u want it
4. Next you unroll the aisle runner over the taped down template you made and tape it so it doesn't move.
5. Trace it on your aisle runner with a pencil. (do it lightly if you plan to use a light color, i didn't and u could see the pencil outline over my orange.)
6. Then you remove the template from under the aisle runner.
7. Tape wax paper down under the aisle runner. (cause the paint will seep through & u don't want your aisle runner sticking to paper or the floor)
8. Tape the aisle runner back down.
9. Start painting, starting with the lightest color. Take your time & pace yourself, if not you'll have screw ups. I started from the top of the page & worked my way down but if u need to it may be best to start in the middle & work your way out.
10. Add any final touches or adjustments to fix any accidents or mess-ups that may have occurred. 
11. Let dry completely. Make sure you store your aisle runner somewhere it wont be ruined like in a garbage bag until the big day.


             YOUR DONE!

Sunday, April 24, 2011

Bridesmaids Survival Kit!

 So today i made Bridesmaids Survival Kits that i will probably give to my bridesmaids the night of rehearsal. In it There is bobby pins, tissue, safety pins, a pack of gum, a nail file, a blue & orange bandaid, & a floss stick.

HOW TO MAKE A BRIDESMAIDS SURVIVAL KIT:
1. Get a bag. I used the baggy that the iron on letters came in that i used on my 'bride' shirt for the baggy for my survival kit. I conveniently had 4 packs of iron on letters because everyone has requested shirts personalized for them, which is just enough to make a kit for all my bridesmaids out of the old packages, talk about recycling.
2. Print off the labels. (I downloaded the labels from  http://www.100layercake.com/blog/2009/03/20/bridal-survival-kit/ )I had a problem getting the label the right size until i realized on the print page i could set it to print 4x6 which is what i needed for each label to fit the package perfectly.
3. Cut out your labels. preferably as straight as possible.
4. Make a support for your labels. Just regular printer paper might not do because there so flimsy! So i printed mine on regular printer paper, took an old coke box & cut out 4 squares the exact size as the labels & folded them in half like the labels would be. I then used a glue stick to glue all the labels to the coke box squares & cut off an excess coke box that might be showing.
5. Fill the bags! You can put whatever you want in these bags but i went with the basics: Nail file, Bobby pins, Safety Pins, Band-aids (in my wedding colors), A pack of Gum, A Floss Stick & some Tissue.
6. Finishing Touches! Next you just take a stapler & Staple the labels onto the bags & your done! They look professional right? lol ENJOY!

Saturday, April 23, 2011

Bridesmaids Dresses!

My bridesmaids dresses are all now ordered!! I have 4 Bridesmaids all together, 3 are wearing a blue dress i purchased from www.amiclubwear.com originally 26 dollars i used a 35% off coupon i found on google & saved some cash on em. I got them in the mail & they all fit the girls perfectly just a little low cut. We are going to make orange sashes for around the waist & cami panels to cover up some of the chest area so its not so low cut. The maid of honor however wanted to be different, wearing an orange dress ordered off ebay from a seller named open_shop88 . they custom make their dresses im pretty sure and she offered to pay for hers and she got to get a different dress. Her dress was about 50 dollars. I can show u pics of the dresses but keep in mind the maid of honor dress will be in orange. 


www.amiclubwear.com                             www.ebay.com  (open_shop88)


i know they kind of look way different here but i think they'll go good together once we get em n the right colors and stuff.

Thursday, April 21, 2011

DIY Personalized Water Bottle Labels!

I thought these were the cutest things but had no clue where to start. So i made a template from scratch on paint and OMG it was sooo hard getting it the right size. i think i printed out atleast like 20 templates b4 i got it the right size to fit my bottles. I tried to use the dimensions i had seen online that said every 72 pixels is an inch & since i was using paint it goes by pixels. so i tried measuring the bottle and figuring out how many inches up and across i needed and multiplying it by 72 to figure out the pixel size i needed. FAIL! it didnt work. so i just kept adjusting the size until it fit. I know lots of water bottles are different but i used the 'Nestle Pure Life" from walmart, you can get like a big case of them for 2 or 3 dollars. I made my label on paint & i was able to print off 5 per page. Ill post my template & you can open it on paint & customize it yourself so you wont have the same fight with sizes that i did.


Do It Yourself Personalized Water Bottle Labels Instructions!
1. Save the label template i have shown. (actual size shown)
2. Personalize it to make it your own on paint or whatever photo editing program you may be using.
3. Print!
4. Cut out each individual label. (take your time & try and do it as straight & neat as possible)


     5. Take the old label off your water bottle.

6. Put your new label around it. (my bottles still had some sticky stuff on it from the original label which will hold your new label pretty good, but just in case i used a regular craft glue stick to make sure it was on there good - or you could always use scotch tape.)


7. Ta-Da! Your Done!


I would reccomend some kind of waterproof paper rather than printer paper. I used regular printer paper and a cheap alternative is to take clear packaging tape & waterproof it yourself, its a pain but definitely worth it. Good Luck & Enjoy!


                                                                                  Wooo!
                                                                 Another Do It Yourself Project Accomplished By
                                                                                            The Hillbilly Princess <3

Wedding DIY Projects!!

I have been thinking about what all DIY things i will be doing for my wedding. So i decided i will write up a list which the list will probably be a work in progress give or take a few things from it. So here's my list:

*Done*
- Personalized Candy Bar Wrappers
Personalized Candy Kiss Bottom Stickers
Day Of Wedding Schedules for Girls & Guys 
Personalized Bride & Maid of Honor Shirts 


*In Progress*
-Personalized Bridesmaids, Groom, Groomsmen, Ring bearer, & DJ Shirts
-Brides Wedding Day Emergency Survival Kit
-Bridesmaids Survival Kit Gifts
-Favors
-Centerpieces
-Homemade Garter
-Personalized Aisle Runner
-Personalized Water Bottle Labels
-Sashes & Cami's For The Bridesmaids Dresses


*DIY Help*
-Flower bouquets & boot's (DIY by my sister)
-Cake (Again being done by my sister)

*Things I MIGHT or might not make*
-Personalized Napkins
-Personalized Name wired hangers for Bridesmaids

Lists are still a work in progress...Suggestions?

Wednesday, April 20, 2011

Day of Wedding Schedules!

I seen this on another brides blog whom i'm sorry but i forgot her blog thingy cause i had x'd it off, but anyways...i decided to make my own. It is a Timeline Schedule for the Day of the wedding! I made one for the girls (me & my bridesmaids) based on the one i seen on someones blog. But after making it i realized the guys needed a schedule too, but not just a regular schedule like ours, a guy friendly schedule. So its kinda a funny version about how guy consider it taking the plunge and the ball and chain. you'll understand when you see it, it was kind of a joke on my part making it, the groom doesn't dread it that bad lol. But i hope you enjoy!

Wedding Location Disaster!

Okay we had a place chosen for our wedding day, we had it arranged to get married there july 7th of this year (2011). It was a banquet room located in a local resturaunt in our town. But now suddenly the place is unavailable to us! According to theknot.com i have exactly 78 days til my wedding. Thats 2 months 2 weeks & 3 days! THATS ONLY 2 AND A HALF MONTHS! and i have NO LOCATION! wow! Disaster has struck so first thing in the morning i have to start calling around and try and find a place to get married at but from what i understand June-July is Wedding Season & also Summer Event season where local places hold events and things like that which might make it hard to find an available place for my wedding. Wish me luck!!
                                                                      -love,
                                                                           Ashley (the hillbilly princess)

Tuesday, April 19, 2011

I Made An Apron!

Although its from a premade pattern kit thing i bought i still done all the cutting & sewing so it still counts as me making it right? lol...im not exactly sure what i need an apron for but its nice to have one especially knowing i made it. what an accomplishment for me! ill probably use it as a around the house/craft apron thing i guess lol. So im gonna make this short & sweet, before & after pics of my awesome apron lol.


Before                                                   After

Monday, April 18, 2011

Wedding Bubbles!

Again i am back, with a very VERY simple D.I.Y. project for my wedding. Ya know how at the end of the wedding as the couple is walking out people used to throw rice, but now have moved to throwing birdseed or somethin like that...So instead of riskin birdseed in my eyes & hair i decided to use bubbles as a cute and much cleaner alternative. In order to customize the bubbles to match the theme of my wedding i used regular ribbon purchased at walmart for about a dollar a roll & tied little knots around the bubbles! its very easy & gives it a cute little touch of color! Happy Monday(=
                                          
                                               -The Hillbilly Princess Strikes Again with her Homemade Wedding Projects

Tuesday, April 12, 2011

Personalized T-shirt!

I seen cute shirts in magazines that can cost up to 20-some dollars that just says "Bride" on it. Soo, i decided to make my own (which if you haven't noticed i tend to do alot.) In silver Glittery letters i wrote "BRIDE" on the front of a black Tank Top & Wrote my 'soon to be' last name on the back. All i did was buy a blank tank top & a pack of iron on letters from the craft section from walmart. Using this pack i also had enough letters to make one for my bridesmaid with her last name on the back & "Maid of Honor" on the front...there's still letters left over. I bought this pack of letters for maybe 3 or 4 dollars and the shirt for 3. So a much better deal you could imagine, especially since my is personalized with what will be my last name on the back also. I love how it turned out, i am most definitely going to be wearing this shirt while doing my important wedding planning & while on my honeymoon in Tennessee! (: I present to you the finished product of my personalized Bride shirt. enjoy!

Monday, April 11, 2011

How To Create Candy Bar Wrappers & Free Mini Candy Bar Wrapper Template.

So while in the midst of wedding planning i came across the situation of needing favors for my guests. I had seen on websites that you can buy pre-made Candy Bar Wrappers personalized with your names or whatever you choose to put on them but they was kinda pricey seeing as how i have 1,000 other things to buy for a wedding that are much more important. But me being the daring DIY Bride i am decided i would attempt at homemade candy bar wrappers for the miniature hersheys bars. While googling up wrapper templates or atleast just the size i needed to make the wrappers i came to a dead end when the whole 1 blank wrapper template i found was the wrong size. So, after a lil bit of adjustment and work i have created the template for my wrapper which i am going to share for all the other Do It Yourself Brides who might want to create and print off their own mini candy wrappers for there wedding or parties without going through all the trouble & hard time i did trying to get the right size wrappers. Its the perfect size for the Miniature Hershey Candys Bars & I hope this will help someone else make their busy wedding planning job easier on them. Below is a picture of the practice run i done on mini bars of Dark Chocolate & a free template you can save and use for your own candy bars along with instructions on how to do it. enjoy!

*TO CREATE YOUR OWN PERSONALIZED CANDY BAR WRAPPERS*
1. Save the blank template i have shown below.
2. Open the saved template on paint or whatever photo editing program you may be using 
3. Just write your names or add a pic within the section titled "front" (that will be the front of your
      candy bar) write or design whatever you would like on these whether it be for a wedding, party, or just  
         to do something special for someone.
4. copy & paste whatever design youve put in the middle of your bar onto all the other bars so
      they all look the same.
5. Print out the page once you've saved the wrapper design you would like. (make sure your printer
      settings are set for picture to fit page & the 8x10inch page otherwise your wrappers might not come out
         the right size. I know this from many printed pages of experience lol.)
6. Next you cut out all of the mini wrappers preferably as straight and neat as you can for a better cleaner
       look.
7. Last you take a stick of regular glue, put it on the back of your homemade wrappers, & glue them over the original wrappers! Your Done!

Now you will have your own personalized Mini Candy Bars to fit your style & occasion.

(This Template is actual size. Enjoy)


My Practice Candy Bars using the template.


BONUS:: A Template to help you also make personalized bottom stickers for Candy Kisses!
    Instructions are same as the candy bar wrappers. Save, Design, Print, Glue!

Candy Kiss Sticker Template! (actual size)


My practice run using the Candy Kiss Template with a design using Initials! (i actually done the practice run on HUGS not kisses cause i had hugs laying around cause i dont really like them lol)

Related Posts Plugin for WordPress, Blogger...